
How to Use Wan 4.0
Follow the video creation workflow from signing in to viewing your finished clip. These real screenshots show the available Wan 3.0 generator.
This How to Use Wan 4.0 guide explains the current website workflow without assuming that the upcoming model is available. Open the Wan 3.0 studio to follow along today, or check the Wan 4.0 overview for its current availability.
- 01
Sign in and connect your account
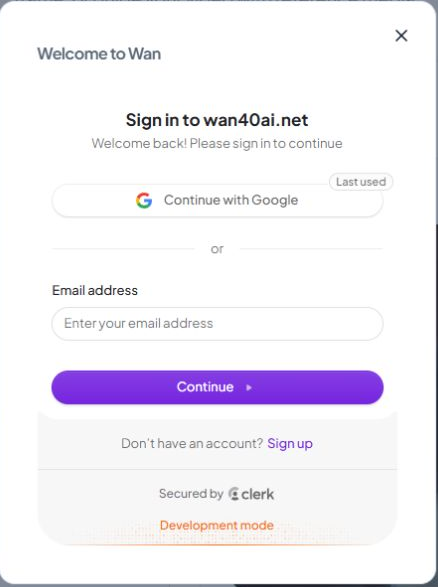
Open the generator and select Sign in in the navigation, or use Sign in to generate beneath the input form. The sign-in window offers the available account methods, including Continue with Google. Choose your account and complete the provider's login flow.
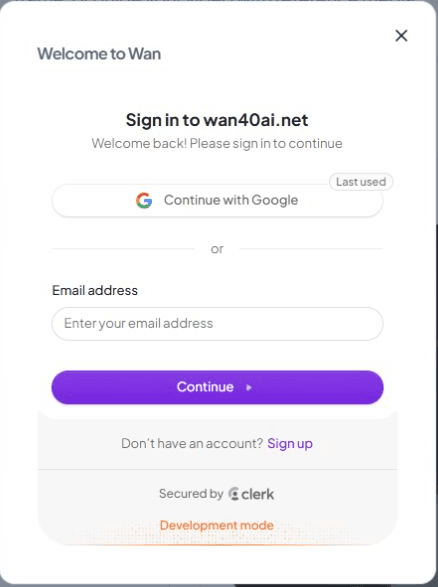
The real sign-in window. Choose your preferred login method before submitting a generation. After signing in, wait for your credit balance to appear in the navigation. An avatar can appear before the credit connection finishes, so allow that account check to complete before pressing Generate video. If the balance remains unavailable, open My Account and check the connection rather than repeatedly submitting the form. You can explore the controls while signed out, but an authenticated account is required to send a generation request.
- 02
Choose your starting point
Text → videoStart with an idea. Describe the scene you want to create.
Image → videoStart with a picture. Add motion and an optional ending frame.
References → videoBring images, clips or audio to guide the look and movement.
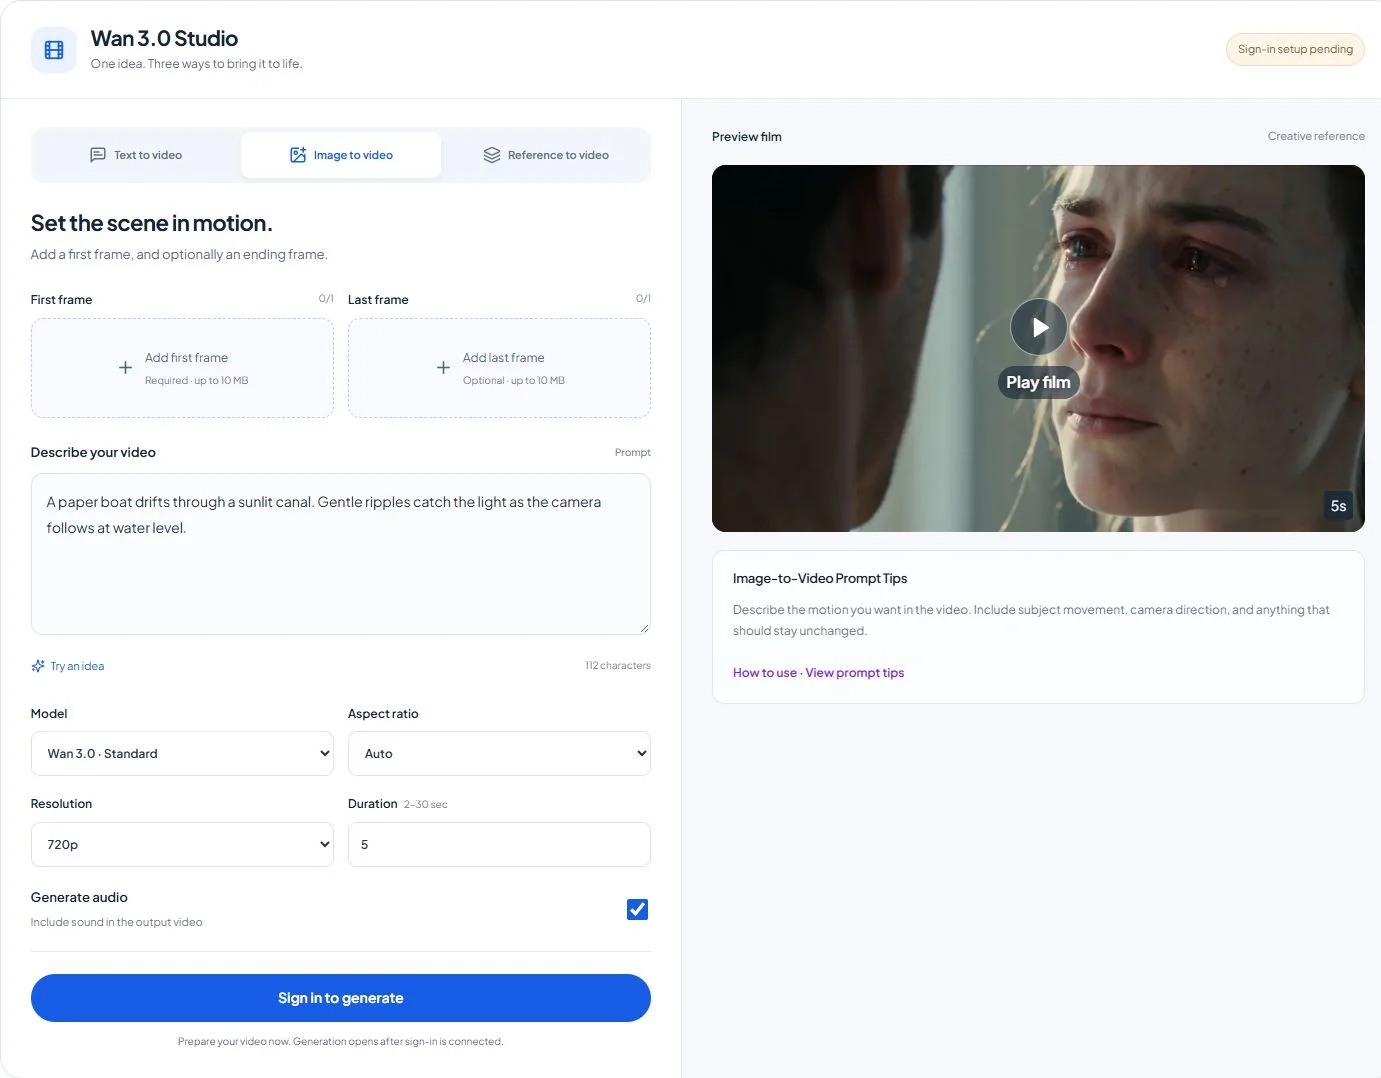
Choose the mode based on what you already have. Use references when source images, video or audio communicate something that your text alone does not explain. Switching modes updates the upload controls and keeps your prompt, so review both before submitting. Selecting a mode does not start generation or charge credits. The preview film initially shown beside the form is a creative reference, not the output of your current request.
- 03
Add a short, clear prompt
Type one scene in Describe your video. Include the subject, its action and the camera direction. For this walkthrough, use the short example below or select Try an idea. Keep the first test focused so you can judge the movement easily.
A paper boat drifts through a sunlit canal. Gentle ripples catch the light as the camera follows at water level.
In image mode, describe the motion you want to add instead of repeating everything visible in the picture. Set technical choices such as resolution and duration using the controls, not phrases in the prompt. Copy an important draft into your notes before replacing it.
- 04
Add source media when your mode needs it
For Image to video, select Upload first frame and choose your picture. The studio shows its preview and filename so you can confirm that the correct file is attached. A Last frame is optional; add one when you want to provide an ending composition. Use the remove control to replace an attachment before generation. Each image can be up to 50 MB, and JPG, PNG and WebP are practical starting formats.
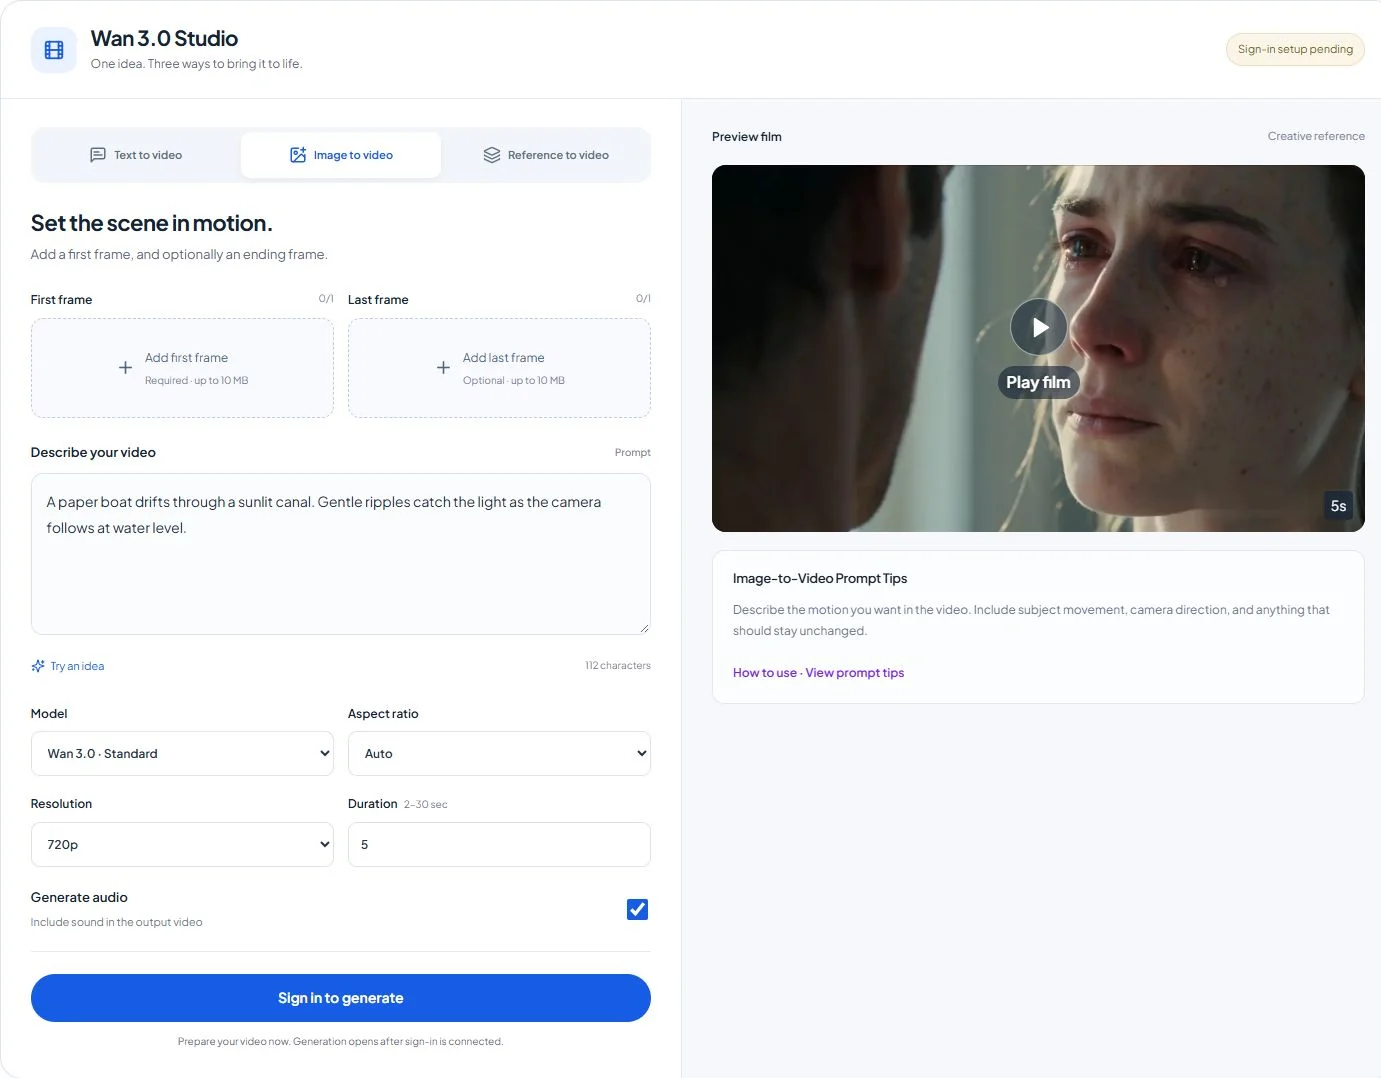
Image mode: add a first frame, then an optional last frame. Interface example; follow the current limits shown in the studio. In Reference to video, attach only the media that serves your brief. The interface provides separate image, video and audio inputs, plus optional document or web-link context. Read the limits beside each input and remove unused items. Reference video length reduces the remaining output duration, so adding footage may require shortening the generated clip. Local selection prepares the draft; submitting an authenticated request uploads the required media to the service. Wait for preparation to finish, and follow any file validation message before trying again.
- 05
Choose the settings for your first take
- Model
- Standard
- Frame
- 16:9 landscape
- Resolution
- 480p
- Duration
- 5 seconds
- Sound
- Audio off
Choose Wan 3.0 Standard or Prime in Model. Next choose Aspect ratio: 16:9 for a landscape video, 9:16 for a vertical composition, or another available shape that matches your destination. Auto is also available. Set Resolution to 480p, 720p or 1080p. The Duration field accepts whole seconds within the range shown by the selected workflow; the current studio supports 2–30 seconds, subject to its reference-media limit.
Generate audio controls whether sound is requested. Turn it off if you want a silent visual test. For the example in this guide, select Standard, 16:9, 480p and 5 seconds, with audio off. A phrase such as “1080p” inside your text does not change the selected resolution, and these current controls do not confirm future Wan 4.0 specifications.
- 06
Know the cost before you create
5 secOutput length4 creditsPer second · Standard 480p20 creditsEstimated total · no input videoThe Generate video button displays the estimated credits beside its label. Adjusting the model, resolution or billable duration changes that estimate. Standard currently uses 4, 8 or 15 credits per second at 480p, 720p or 1080p. Prime uses 6, 12 or 24 respectively. Our five-second Standard 480p example therefore shows approximately 20 credits. Final credit charges are determined by the service.
A workflow with billable input video can cost more than an output-only request because both input and output duration contribute. Use the credit calculator and package comparison with matching assumptions rather than comparing different resolutions as if their costs were equal. Check your available balance before submission and leave room for another take if your scene needs revision. If you need more credits, choose a package on Pricing. Signed-out visitors see Sign in to purchase; signed-in purchases currently open instructions to contact the support email, rather than an online checkout.
- 07
Generate once. Follow the progress.
- Check balance
- Prepare files
- Generate video
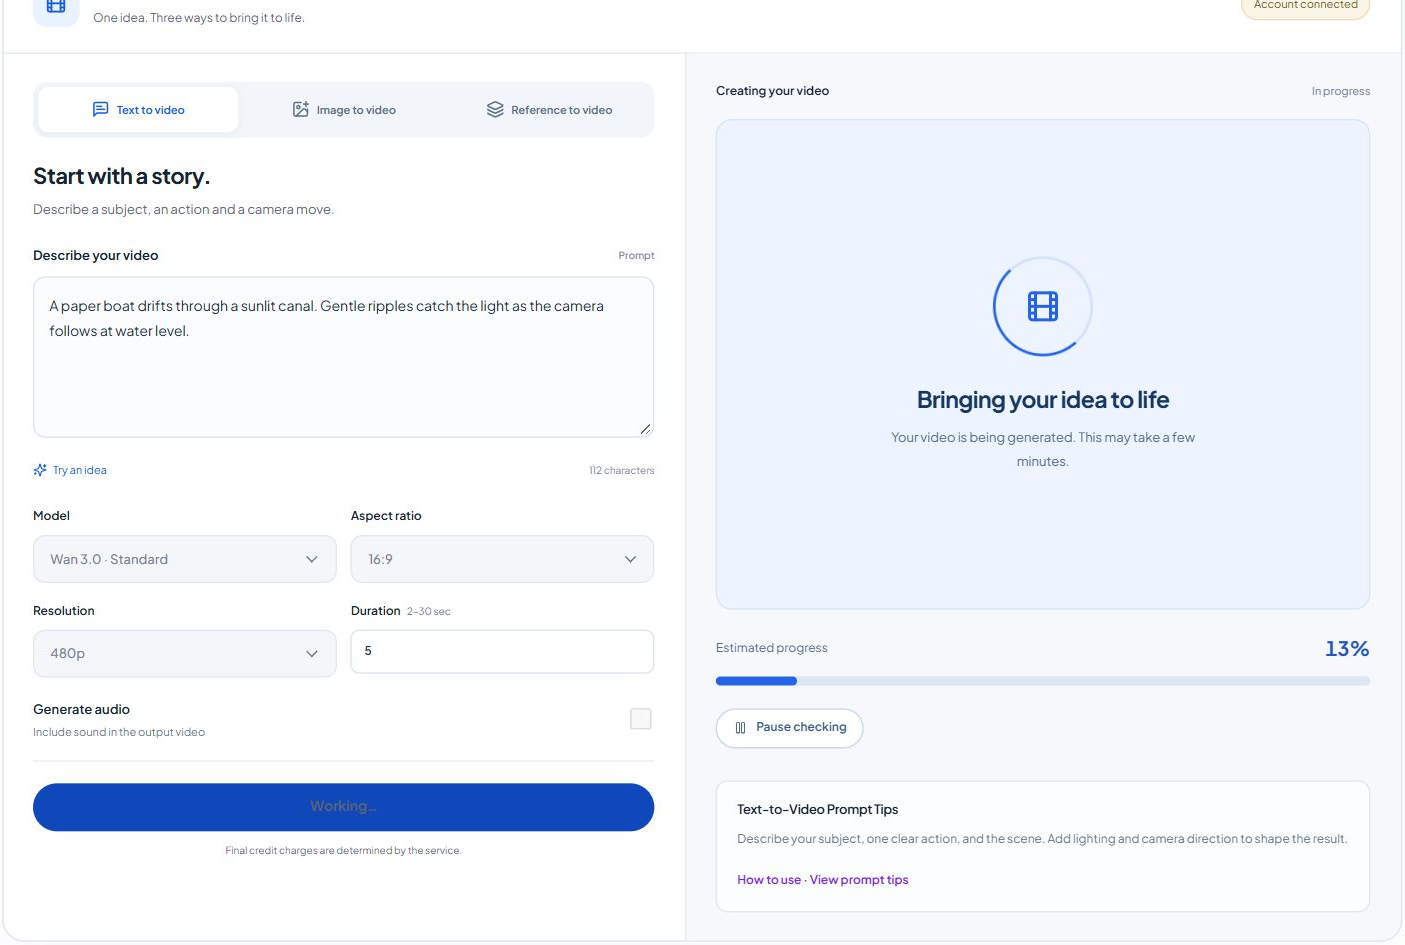
Once the prompt, attachments and estimate look correct, press Generate video once. The button changes to Working while the request is prepared, and the result panel shows Creating your video. Inputs are disabled during active work so the submitted settings remain clear. Status messages can cover balance checking, uploading media and waiting for the service. Keep the page open while you follow the request.
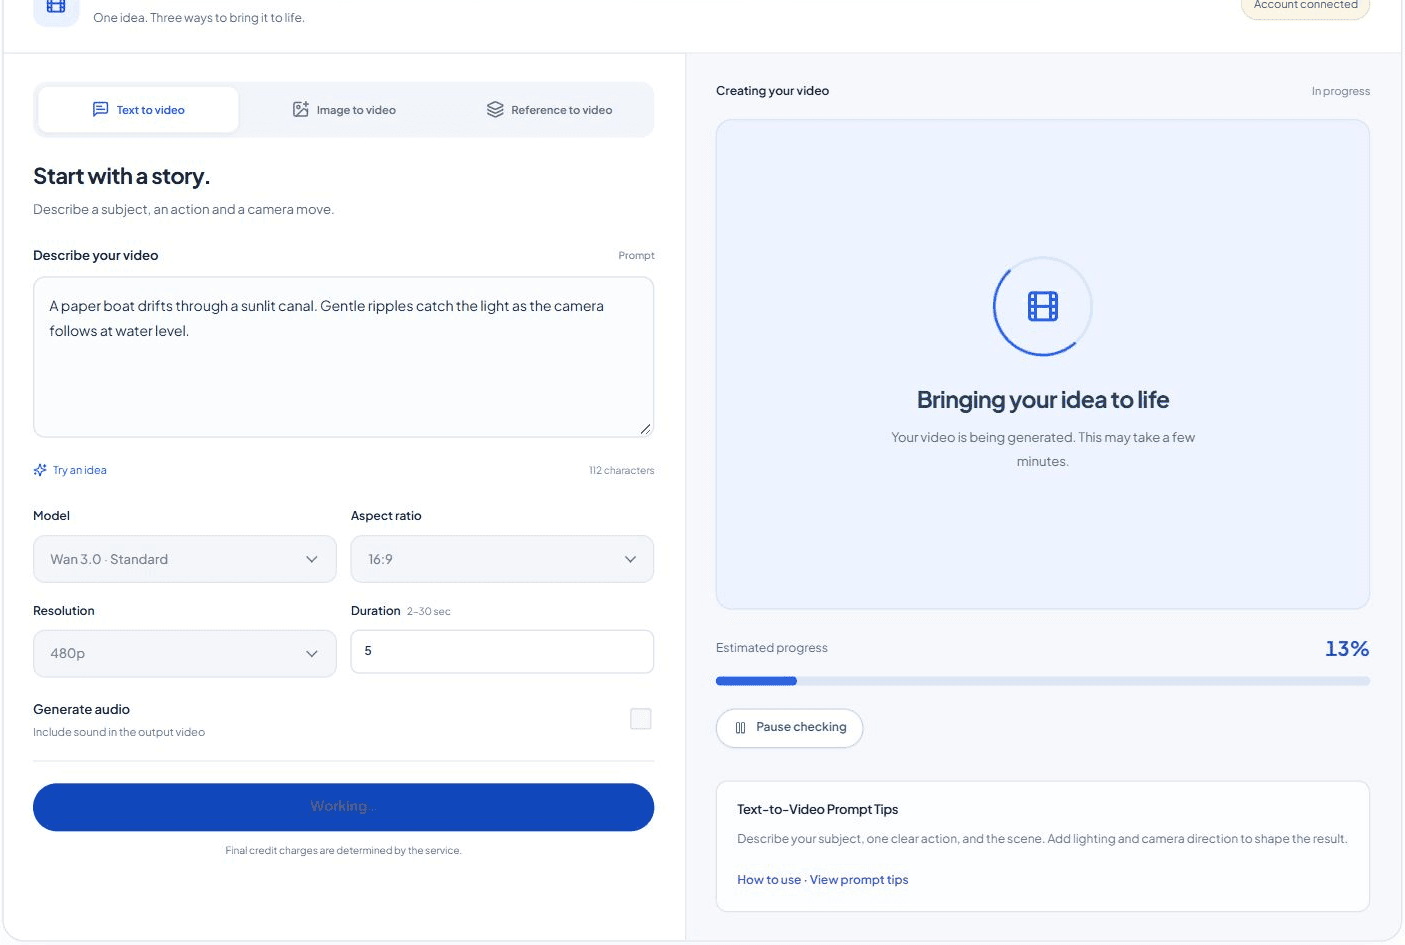
A real submission using Standard, 480p and a five-second paper-boat prompt. Progress is an estimate, not a completion timer. The percentage is estimated progress; reaching a particular number does not promise a finish time. If checking pauses or the connection drops, use the task's available checking controls or look in your Library before starting another request. Pausing status checks does not cancel work already submitted to the service. Avoid pressing Generate again merely because a request takes longer than expected: that may create a separate billable task. If an error appears, read its message and correct the specific issue before retrying.
- 08
Your video is ready. Make it yours.
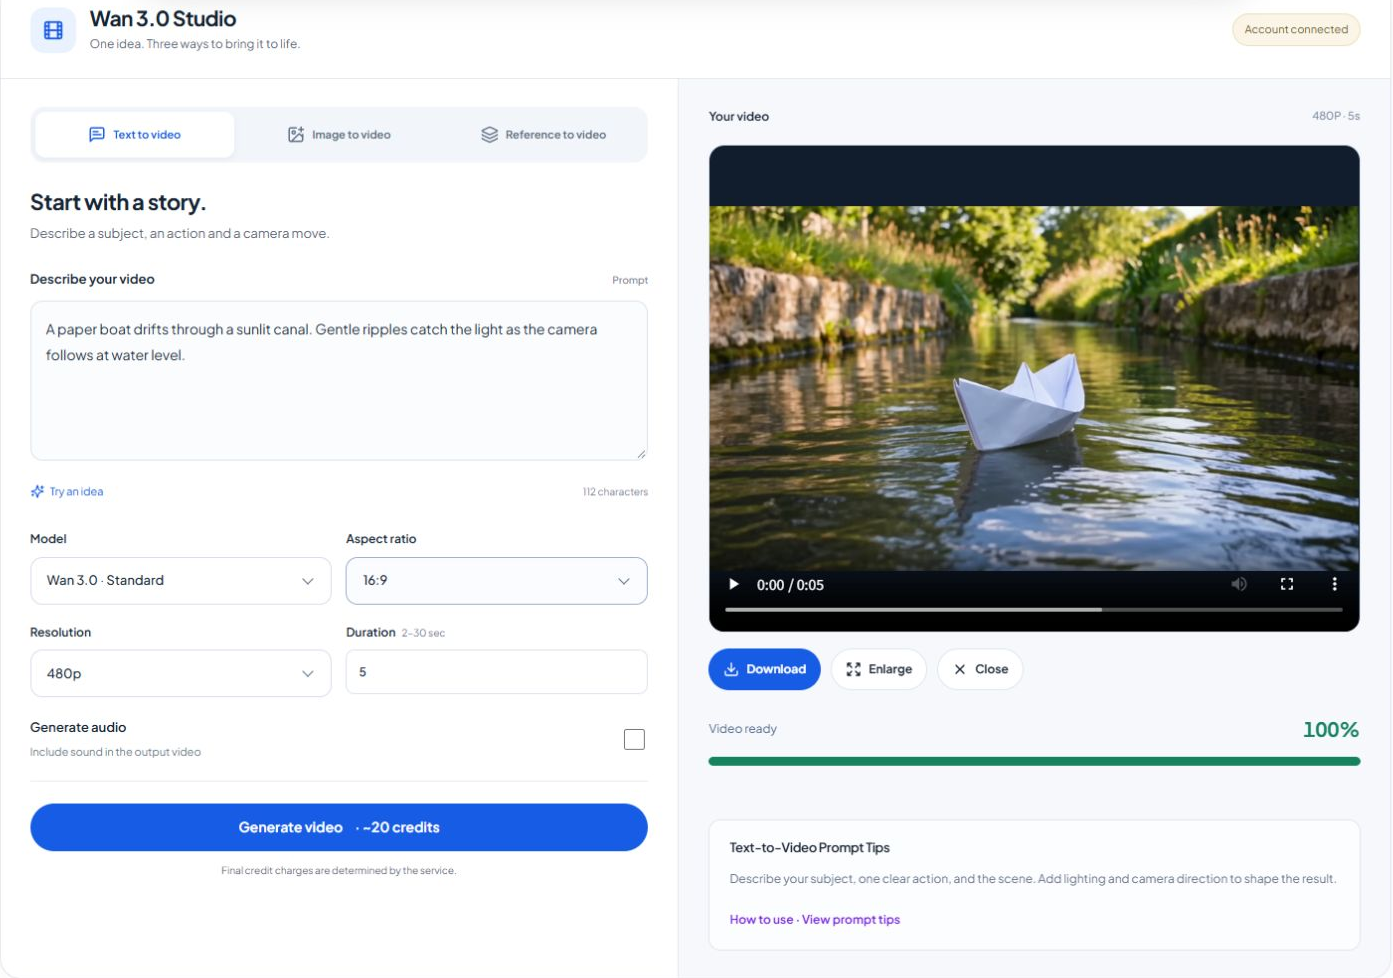
Play & reviewEnlarge the viewDownload & keepWhen the service reports success, the returned video appears in the result area. Play it and check the main action, framing and motion against your original idea. Select Download to save the clip, or Enlarge for a bigger view. Close dismisses the result preview. Saving a result does not generate another video.
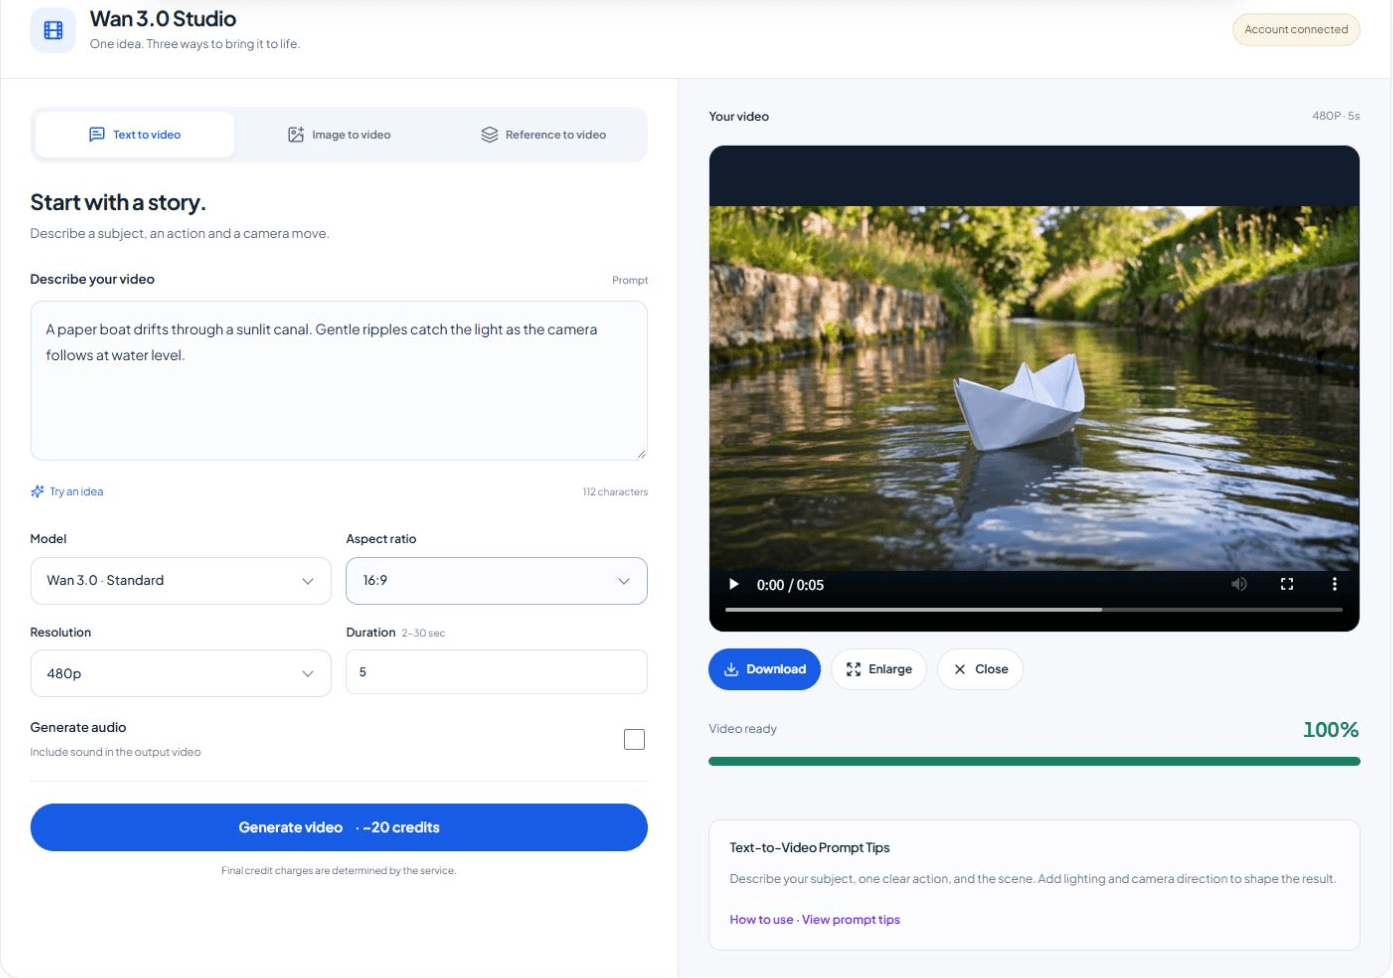
Actual completed result: five seconds at 480p, generated with Wan 3.0 Standard for 20 credits. Visit My Library to review your generation history. Its cards show the prompt and current status, with a playable video and Open video link when a result is available. Use Refresh to check recent tasks, and Previous or Next to browse older pages. Processing means the task is still pending; Failed is different from a result that has become unavailable. Check any displayed availability period and save important results before they are removed.
For a second take, return to the studio and change one meaningful detail, such as camera movement or lighting. Review the new cost before submitting. The workspace keeps a browser draft when storage is available, but your own notes and saved videos are useful backups. This completes the available workflow described in How to Use Wan 4.0; generation shown here uses Wan 3.0 while Wan 4.0 generation is unavailable.
Video generator questions
Quick answers about login, credits and results.
Can I generate with Wan 4.0 now?
Wan 4.0 generation is not available on this website. This guide demonstrates the available Wan 3.0 studio with real interface screenshots. Its controls and example costs apply to that current workflow, not to unconfirmed Wan 4.0 features.
Do I need to sign in first?
You can inspect the generator without an account. Sign in and wait for your credit balance to load before submitting. If the credit balance is unavailable, check My Account before retrying.
Can I start with free credits?
Check the balance shown for your connected account. If free credits are available, they can contribute to your generation budget. Review the displayed estimate; having an account does not make every video free.
Why does the cost change?
Model, resolution and billable duration affect the estimate. Billable input video adds to output costs. Compare equivalent settings in the pricing calculator, and remember that final charges come from the service.
What if progress stops updating?
Check the task status and your Library before submitting again. A paused browser check does not cancel a submitted task. Follow the displayed error or checking controls, and contact support if the task remains unclear.
Where do I find and save results?
A successful result appears in the studio and your Library. Open video loads the returned file. Use the browser's available save controls and keep important files before any displayed availability period ends.
Need help with a task? Email support with the task ID and displayed error.
Ready for your first video?
Open the Wan 3.0 studio, choose your starting point and review the credit estimate. Explore the Wan 4.0 overview for the upcoming experience.